Updated July 2025: Stop these error messages and fix common problems with this tool. Get it now at this link

If you get the error message “Hardware problems detected” when running the Windows Memory Diagnostics tool on Windows 11/10, this article may help. This error indicates that there is a problem with a hardware component.
Some affected users have reported that the system hangs when they try to reboot the computer. They tried running the Windows memory diagnostic tool and it produced this error.
Before talking about solutions, it’s worth looking at the scenarios that can cause these problems. Listed below are the most common causes of this error when running the Windows memory diagnostic tool.
Table of Contents:
What causes the ‘Hardware problems detected’ error message?
- Common hardware driver problems: If you see this error message because a non-core hardware component is forced to work with a partially incompatible driver.
- Overclocking makes the system unstable: If you have recently overclocked the frequencies and voltages of some of your components, be aware that the Windows memory diagnostic tool may detect this and issue an error message, warning you of possible component overheating.
- Damaged system file: it is not uncommon for this type of problem to be caused by a corrupted system file that affects memory management.
- Faulty RAM key: If you are unlucky enough to have a faulty RAM key, this error message is usually the first indication that you should replace it.
- Various faulty hardware components: It turns out that a faulty RAM key isn’t the only hardware component that can cause this type of error with the Windows memory diagnostic tool. The problem could also be the motherboard or even the power supply.
How do I fix the “Hardware problem detected” error?
This tool is highly recommended to help you fix your error. Plus, this tool offers protection against file loss, malware, and hardware failures, and optimizes your device for maximum performance. If you already have a problem with your computer, this software can help you fix it and prevent other problems from recurring:
Updated: July 2025

Launch the Windows troubleshooter
- Click on the Start button.
- Go to Settings.
- Select Update and security.
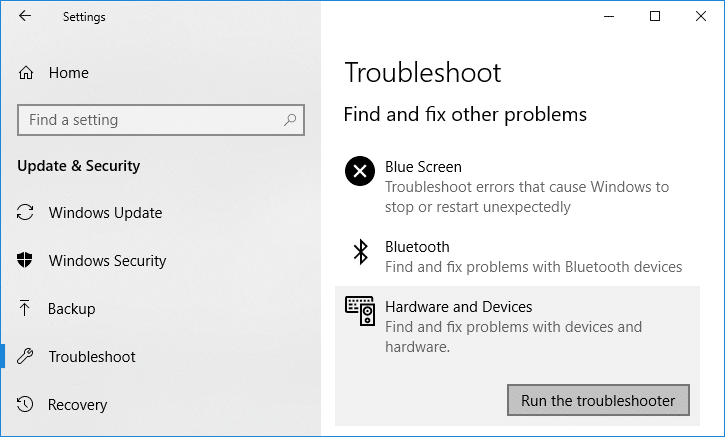
- Click on Troubleshooting.
- Select Hardware and Devices.
- Click Perform Troubleshooting.
- When the scan is complete, click Apply this fix.
- Reboot your computer.
Erasing CMOS using the battery method
- Turn off your computer.
- If necessary, unplug the computer from the power outlet.
- You can press the power button several times. This will discharge all of the capacitors.
- Then turn the computer upside down and open the battery case or the hatch that houses the CMOS.
- Look for the CMOS battery.
- Carefully remove the battery. If you find a clip, be careful not to unscrew it.
- After removing the battery, wait a few minutes.
- Then put the CMOS battery back in place.
- Restart the computer.
Perform hardware and device troubleshooting
- Press Windows + R to open the Run dialog box.
- In the text box that appears, type “ms-settings: troubleshoot” and press Enter to open Hardware and Device Troubleshooting.
- Once in the Troubleshooting tab, click “Other Troubleshooting” on the right-hand menu.
- Then scroll down the list of available options and click the Troubleshooting button associated with Hardware and Devices.
- Once you begin troubleshooting, patiently wait for the investigation phase to complete.
- If a viable repair strategy is found, a window appears where you can click Apply this fix to automatically apply the repair strategy.
- After the repair is successful, restart your computer and then run the Windows memory diagnostic tool again to see if the problem is fixed.
Clean installation or installation with Windows restore
This error can be caused by corrupted system files that affect the Windows Memory Diagnostic Tool or its associated kernel dependency. In this case, you need to replace the corrupted system files and restore the healthy files. You can do this by reinstalling Windows. You can also try to repair your Windows computer to avoid having to reinstall everything again.
APPROVED: To fix Windows errors, click here.
Frequently Asked Questions
How do I repair the “Hardware problem detected” message in the Windows memory diagnostic?
- Follow the Windows troubleshooting procedure.
- Clear the CMOS using the battery method.
- Perform hardware and device troubleshooting.
- Perform a clean installation or a restore installation of Windows.
Why does the Windows memory diagnostic show a “Hardware problem detected” error?
If this error message appears because a non-essential hardware component is running with a partially incompatible driver. If you have recently overclocked the frequencies and voltages of some of your components, you should be aware that the Windows Memory Diagnostics tool can detect this and issue an error message, warning you of possible component overheating.
What does the error message “Hardware problems detected” in the Windows Memory Diagnostics tool mean?
This error actually indicates a problem with a hardware component. It causes the system to freeze when the user restarts the computer.