Updated July 2025: Stop these error messages and fix common problems with this tool. Get it now at this link

Windows 10 has released many updates with even more interesting features, and all of them are free. But some problems remain, despite frequent updates and numerous bug fixes. However, if you look around and look in the right places, you can find solutions to most of your problems that don’t seem to be solved yet.
In this article, we’ll look at the “Operating system version not compatible with auto-recovery” error message that appears when you try to run auto-recovery.
Table of Contents:
What causes the “Operating System Version Is Incompatible with Startup Repair” error message?

This error is most likely caused by an unsigned driver update, a corrupt or incompatible driver, or a rootkit infection. So, without wasting any time, let’s see how to fix the incompatible OS version with Startup Repair using the troubleshooting guide below.
How do I fix the “OS version is incompatible with Startup Repair” error message?
This tool is highly recommended to help you fix your error. Plus, this tool offers protection against file loss, malware, and hardware failures, and optimizes your device for maximum performance. If you already have a problem with your computer, this software can help you fix it and prevent other problems from recurring:
Updated: July 2025


Perform an automatic repair of WinRE
- Insert the USB flash drive or DVD
- Reboot the computer
- Press the F12 key on your computer to open the Windows installer.
- Select the drive where you inserted the USB drive or DVD.
- Click Next
- Select Computer Repair.
- A blue screen with options will appear
- Select Troubleshooting.
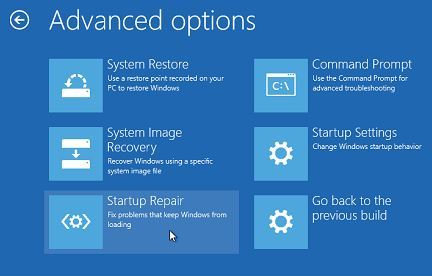
- Select Advanced options
- Select Boot Repair (or Auto Repair) from the Advanced Boot option.
- After the repair is complete, try restarting the computer to see if the problem persists.
Perform a restart
- Navigate to the search box.
- Type MSConfig
- Select System Configuration
- Find the Services tab
- Select the Hide all Microsoft services check box
- Click Disable All
- Click the Run tab
- Click Open Task Manager.
- Close the Task Manager and click Ok.
- Restart your computer
Unplug all devices
If you can’t get your computer’s startup screen to start, try disabling all devices connected to your computer except your keyboard and mouse. Try rebooting.
APPROVED: To fix Windows errors, click here.
Frequently Asked Questions
Why does my Startup Repair not work?
As you can see, the problem of Windows 10/11 Startup Repair not working can be caused by corrupt, invalid, or deleted system files. Therefore, it is important to back up your system image so that you can restore your system to a normal state in case of a problem.
How to fix the boot repair?
First, completely shut down your computer. Then turn it on and keep pressing the F8 key during startup. This will bring up the Advanced Boot Options screen, from which you can start Safe Mode. Select "Repair Computer" and start the boot recovery.
How do I fix the fact that Startup Repair failed to repair my computer?
- Rebuild the BCD and restore the MBR.
- Run the chkdsk command.
- Run SFC and use the DISM tool in safe mode.
- Disable antimalware protection at boot time.
- Disable auto-recovery at boot.
- Restore the registry from the RegBack directory.
- Reboot this computer.
How do I fix a problem with my operating system?
- Click Start, type System Restore in the Start search box and then click System Restore in the list of programs.
- In the System Restore dialog box, click Select another restore point, then click Next.
- In the list of restore points, select the restore point you created before the problem occurred, and then click Next.
- Click Finish.