You can restore the installed Veeam Backup Enterprise Manager. So:

- Run the setup wizard on the Veeam Backup Enterprise Manager server. For more information, see Veeam Backup Enterprise Manager. Run the Startup Configuration Wizard.
- Read and accept the license agreement. For more information, see the Startup Configuration Wizard. Read and accept the license agreement.
- In the Maintenance Mode step of the setup wizard, select the Restore option and click Next.
- Specify the service account credentials that will be used to restore Veeam Backup Enterprise Manager. For more information, see “Restore”. See the section Defining service account settings.
- In the “All is ready to install” step of the installation wizard, review the installation requirements and click “Install”.
The installation wizard will reinstall the Veeam Backup Enterprise Manager components. Wait until the installation process is complete and click Finish to close the Installation Wizard.
Table of Contents:
How do I completely uninstall Veeam Backup and Replication?

Use programs and components to uninstall Veeam Backup and Replication.
When a new program is installed on your system, it is added to the list in the “Programs and Components” section. If you want to uninstall a program, you can delete it in the “Programs and Components” section. If you want to uninstall Veeam Backup and Replication, you must first uninstall it in the “Programs and Components” section.
- Open “Programs and Components”.
- Open the WinX menu while holding down the Windows and
- X keys, then click on “Programs and Components”.
- Find it in the Veeam Backup and Replication list, click it, then click “Delete” to start deleting.
Uninstall Veeam Backup and Replication using the uninstaller.exe file.
Most computer programs have an executable file named uninst000.exe or uninstall.exe or something similar. You can find these files in the Veeam Backup and Replication installation folder.
Browse to the Veeam Backup and Replication installation folder.
Browse to uninstall.exe or unins000.exe. Double-click the uninstaller and follow the wizard to remove Veeam Backup and Replication.
Incompatible Veeam Backup version for Office 365 Server
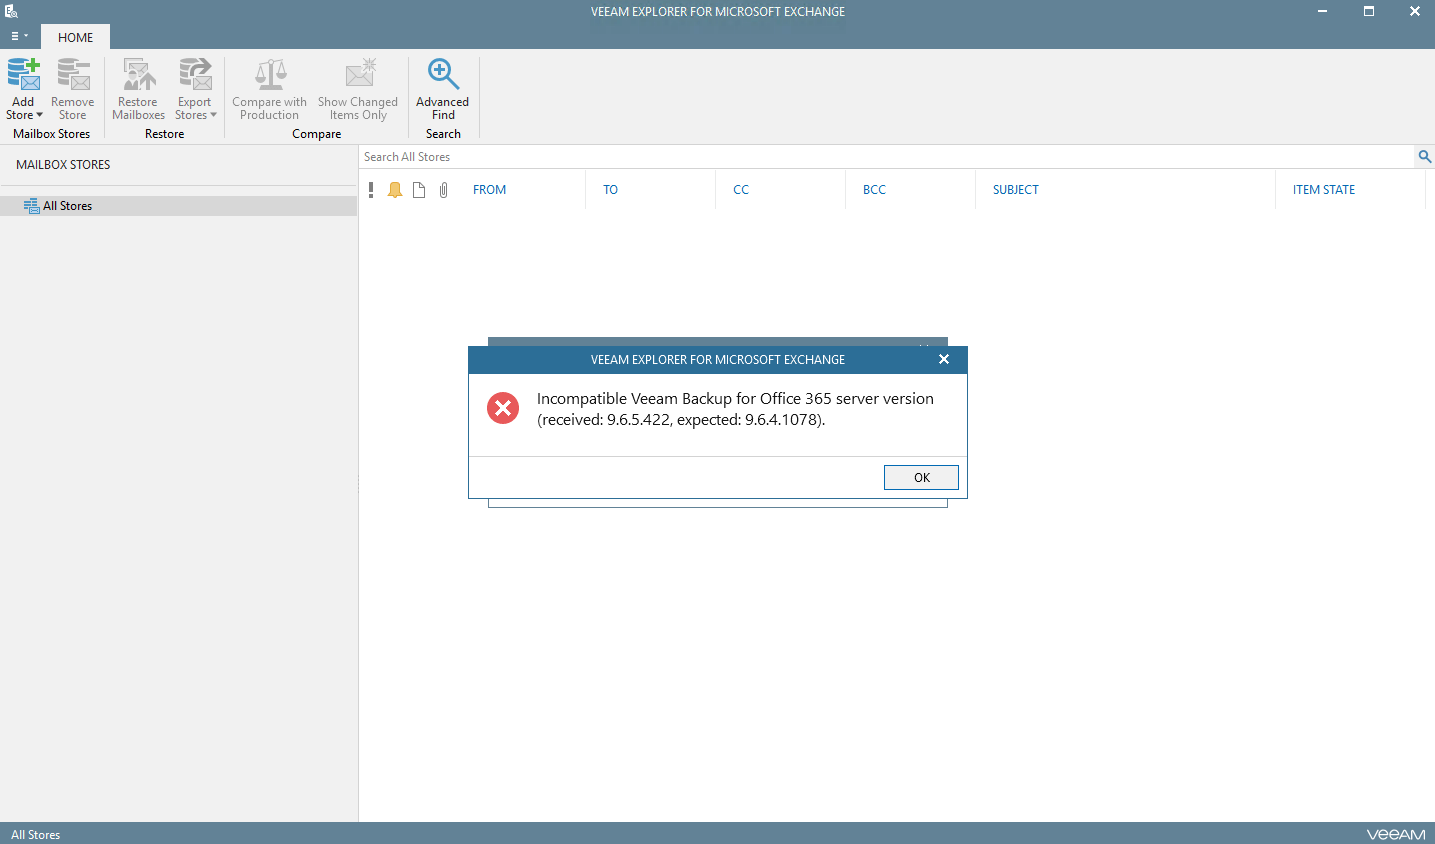
This error occurs after downloading Veeam Explorer for Microsoft Exchange and trying to connect to VBO server. The error is a bit misleading because it is actually a version of Explorer and not the VBO server itself.
If you look at the zip file downloaded from VBO v3, you will see three installers.
The simple solution is to install a new version of the Explorer. The Dead Gift is a new home screen.
When the process is complete the restart of the Explorer session will be successful and you will see a list of mailboxes that have been backed up.
Reconnect the SQL Server Connection
All VAC data is stored in the main SQL Server database. For this reason, it is crucial that the connection between the VAC service and the SQL database is always guaranteed. There may also be situations where we need to change these connection settings, such as B., when we switch from one deployment type to another.
In all these cases, we are in a situation where the settings are stored in the database itself, but the database itself is not available. However, VAC has a special option to log into the console without logging into SQL to restore or modify it.
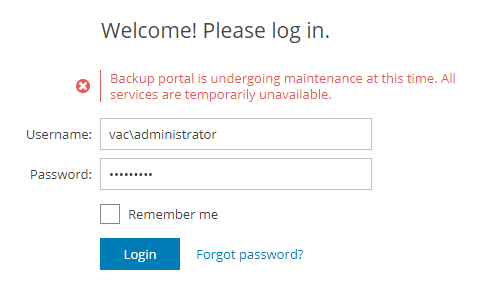
When we try to connect to the VAC, when the connection to the database is lost, we may get the following error:
This message is deliberately general in nature, because we want intruders not to brutally force the login screen to find out if SQL is unavailable, if the user is present, and so on. Д.
As administrators, we can restore an SQL connection using the following procedure:
- Log on the server where the VAC service is running.
- Stop the VAC service using the command line:
stop VeeamManagementPortalSvc - Run VAC in easy mode using the command line:
- Run VeeamManagementPortalSvc Lightweight
- Log in locally (or via remote desktop) on a computer with VAC web user interface.
- Open your browser and specify the URL https: // localhost: 1280.
NOTE. Do not use the link created by the installer. This leads to the full domain name (FQDN) of the server which does not allow the connection. Registration should take place through the localhost interface. - Log in to the user interface with a user who is the local administrator of a Windows computer running the VAC service. In the Simplified Mode, local administrators can still log on to troubleshoot database connectivity issues. In a distributed installation, if WEB01 is a web interface server and VAC is a VAC server, we need to connect to VAC \ Administrator.
- We are now connected to the VAC in Maintenance mode:
As we can see there are only two possible operations and the default is to change the SQL connection settings. After fixing and saving this problem, the maintenance mode will be disabled and the SQL connection will be restored correctly.
NOTE: If we have configured the VAC theme to use a color other than blue by default, we will find that the maintenance mode will also revert to this color, because the parameter is also stored in a database that cannot be viewed . When the user interface returns to the color of our choice, this is a quick sign that the SQL connection has been restored.
The Veeam Backup & Replication console does not open when the hostname is changed.
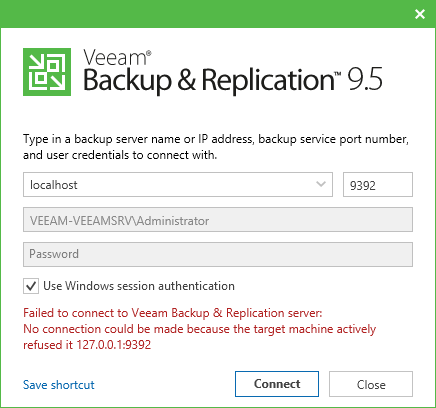
If you change the host name for a computer with Veeam Backup & Replication installed, the console may not open with an error (see next screenshot):
The Veeam Backup service is stopped. An attempt to start the Veeam Backup service causes a problem.
While logging, the Veeam Backup service is trying to connect to SQL using the previous hostname. % programdata% \ Veeam \ Backup \ Svc.VeeamBackup.log:
The [database] information connects to SQL Server (CurrentUser = [NT AUTHORITY \ SYSTEM], ServerInstance = [<OldHostname> \ <SQLInstanceName>], Options = [Direct]).
Information [DB | Error] Failed to connect to the server.
To solve this problem, update the product configuration by specifying the current hostname using the following steps:
- Open the Configuration Database Connection Settings program, which should be displayed in the “All Programs” menu of Veeam Backup & Replication server.
- In this program, select Veeam Backup and Replication and click Next.
- Find the server name. This field is formatted as follows: <Hostname> \ <SQLInstanceName>.
- Change the first part of the server name to match the current host name of the Veeam Backup & Replication machine, and click Next.
- Veeam connects to the database. Wait until this process is complete and click Next. The Veeam service shall be started.
- When this is done, click Finish and try to log into the Veeam Backup & Replication console.