- Download and install the software.
- It will scan your computer for problems.
- The tool will then fix the issues that were found.
With up to a billion users, Windows is steadily climbing the ladder of popularity. Microsoft strives to make Windows a better operating system by regularly releasing updates. But these updates sometimes bring bugs and bugs that make it difficult for this operating system to perform certain functions. “The device has not been ported because of a partial or ambiguous match.” If any of you have seen this on your Windows device, don’t worry. We’ll discuss everything you need to know about this error and how to fix it completely.
Table of Contents:
Why do you see the error “was not migrated due to a partial or ambiguous match” on your PC

The only explanation for this problem is incompatible existing drivers or corrupted system files. Here are possible Windows 10 scenarios that may prevent you from migrating your drivers/devices to the latest version of Windows:
- Some system files are corrupted.
- Some device drivers are incompatible or corrupt.
- You have two operating systems installed on your PC.
- An older version of Windows has been upgraded to a newer version.
- The device driver for your system is not supported by the Windows operating system.
- The Plug-and-Play (PnP) feature is not compatible with your version of the Windows operating system.
- An older version of the Windows operating system has been updated by uninstalling the previous version.
How to resolve the “was not migrated due to a partial or ambiguous match” issue
Reinstall drivers
Microsoft Windows 10 offers several ways to reinstall drivers, including using the Device Manager, downloading drivers from the manufacturer’s website and using a driver update tool. Here’s a step-by-step guide on how to reinstall drivers on Windows 10:
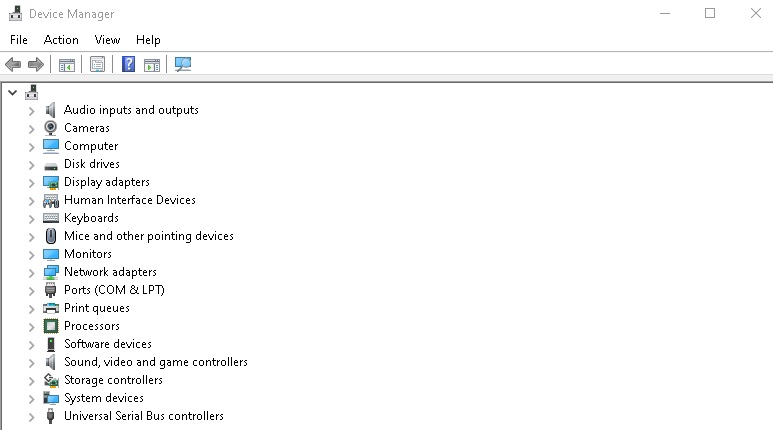
Use the Device Manager to reinstall drivers:
- Open the Device Manager (press the Windows key + X and select Device Manager from the menu).
- Find the device you want to install the driver for, right-click it and select Uninstall device.
- Restart your computer (this will automatically reinstall the driver).
Download drivers from the manufacturer’s website:
- Visit the manufacturer’s website and find the driver you need.
- Download and install the driver on your computer.
Updated: August 2024
This tool is highly recommended to help you fix your error. Plus, this tool offers protection against file loss, malware, and hardware failures, and optimizes your device for maximum performance. If you already have a problem with your computer, this software can help you fix it and prevent other problems from recurring:
- Step 1 : Install the PC Repair and Optimizer Tool. (Windows 10, 8, 7, XP, Vista).
- Step 2 : Click Start Scan to determine what problems you are experiencing with your computer.
- Step 3 : Click Repair Allto resolve all problems.

Roll back drivers
- Open the Start Menu and search for “Device Manager.”
- Click on “Display adapters” to expand the category.
- Right-click on your graphics card and select “Properties.”
- Go to the “Driver” tab and click on “Roll Back Driver.”
- If the option is disabled, it means that you don’t have a previous driver version to roll back to. In this case, you’ll need to uninstall the driver and then reinstall it from scratch.
- To do this, go to the “Driver” tab and click on “Uninstall.”
- Confirm the action and then restart your computer.
- Once it boots up again, Windows will automatically install the default drivers for your graphics card.
- You can also download drivers from your graphics card manufacturer’s website and install them manually.
- This is usually not necessary unless you’re trying to fix a specific problem or improve performance.
Run SFC scan
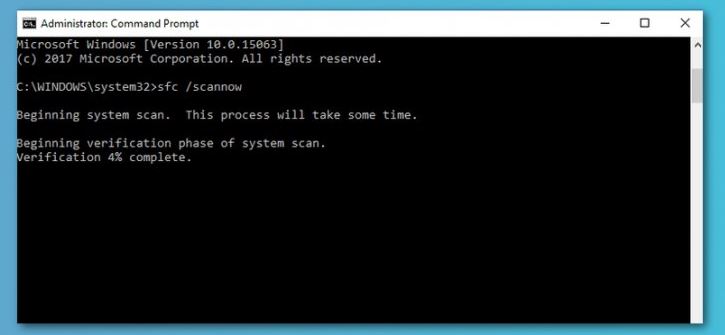
Windows 10 offers a number of ways to keep your PC running smoothly, and one of the most effective is to run an SFC scan. This scan checks for corrupt or damaged files and replaces them with healthy copies from Windows’ cache. Here’s how to run an SFC scan on Windows 10:
- Press the Windows key + X to open the Power User menu.
- Select Command Prompt (Admin) from the menu.
- In the Command Prompt window, type sfc /scannow and press Enter.
- The scan will begin and may take several minutes to complete.
- Once it’s finished, you’ll see a message indicating whether any problems were found and fixed.
Run DISM tool
DISM, or Deployment Image & Servicing Management, is a tool that can be used to repair Windows 10 images. The DISM tool can be used to fix corruption errors in the Windows image, or to install features and updates that are not yet available through the regular update process. Here’s how to run the DISM tool on Windows 10:
- Open the Command Prompt as an administrator. To do this, search for “Command Prompt” in the Start menu, and then right-click on the result and select “Run as administrator.”
- Type the following command into the Command Prompt and press Enter: dism /online /cleanup-image /restorehealth
- Wait for the scan to complete. This may take several minutes.
- Once the scan is complete, restart your computer and check for any improvements in your system’s performance.
Update Windows
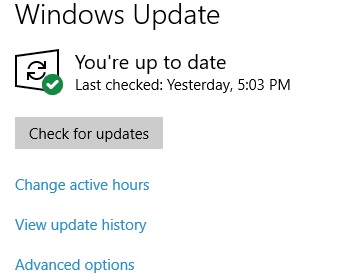
Updating your Windows 10 computer is a simple process that can usually be completed in just a few minutes. Here’s a step-by-step guide to updating your Windows 10 computer:
- Click on the Start button, then select Settings.
- In the Settings window, click on Update & Security.
- In the Update & Security window, click on Check for Updates.
- If any updates are available, they will be downloaded and installed automatically.
- Once the updates have been installed, you will be prompted to restart your computer. Simply follow the instructions on the screen to complete the restart process.
And that’s all there is to it! By following these simple steps, you can ensure that your Windows 10 computer is always up-to-date with the latest security patches and software improvements.
Go back to a system restore point
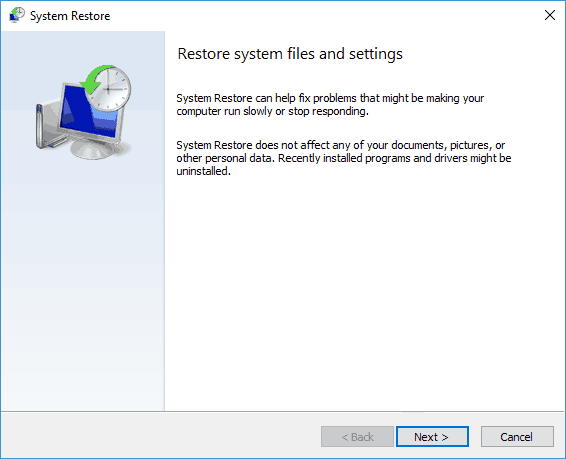
System Restore is a valuable tool that can be used to roll back changes to your computer, including installed programs and drivers, as well as Windows system files. If you’re having problems with your PC, a System Restore can often fix the issue without affecting your personal files. Here’s how to perform a System Restore on Windows 10:
- To perform a System Restore, open the Start menu and type “Restore.”
- Click the first result to open the Restoration Wizard window.
- Select the restore point you created and click “Next.”
- Click “Finish” to confirm and begin the restore process.
- Once the restoration is complete, restart your computer if prompted.
Follow these steps and you’ll be able to use System Restore to fix any problems you may be having with your Windows 10 PC.
APPROVED: To fix Windows errors, click here.
Frequently Asked Questions
What is not migrated due to a partial or ambiguous match?
One way to solve the problem when a USB device does not transfer because of a partial or ambiguous match is to use a different USB port on the computer. If the hard drive is connected via USB, use a different port and see if it works. If your old port has a problem, that should solve it.
How do I fix my audio device is not migrated?
- Update Windows.
- Reset or update BIOS.
- Check the system files.
- Update the chipset driver.
- Reinstall the device driver.
- Check the USB connections.
What is an ambiguous match?
The device did not move due to a partial or ambiguous match is a bug that usually occurs after a Windows update. This problem usually occurs because some drivers have not been updated and are not recognized.
