- Download and install the software.
- It will scan your computer for problems.
- The tool will then fix the issues that were found.
Windows Error Reporting (WERFault.exe) is one of those processes we don’t know what it does. We’re pretty sure it’s something important because Microsoft makes it mandatory. However, some users reported problems with WERFault.exe causing high CPU and disk usage. This issue occurred even though the process wasn’t running. If you experience similar issues, here are steps to resolve the problem.
Table of Contents:
What is a windows error reporting service?

Werfault exes are part of Microsoft’s Windows operating system. They report problems such as crashes, freezes, and hangs. These processes run automatically once you start up your computer. If Werfault.exe stops working, it could indicate a hardware or software issue. You might want to check out our guide to fixing Werfault.exe errors.
If you see Werfault.exe running in Task Manager, you can stop it there. However, if you don’t know what it does, you might want to disable it altogether. This way, you won’t receive any notifications about issues that occur during startup.
How does the windows error reporting service work?
Windows 10 error report is one of those features that many people don’t know about. This tool gives you a chance to report bugs and errors related to Windows 10 directly to Microsoft. You can use it to submit issues regarding Windows Store apps, Windows Phone apps, and even Windows itself. If you find something wrong with the operating system, you can click “Send Feedback,” and Windows Error Report will do the rest.
The feature works like this:
When you install a new device, Windows Error Report pops up in a Notification Window. In case you want to report a bug or error, simply click the button labeled “Report a problem.” After that, you’ll see a pop-up asking you to select the type of issue you’re experiencing. Selecting the correct option will help us better understand what’s happening.
Once you’ve selected the appropriate option, you’ll be asked to provide additional information about your experience. For example, you might be prompted to include a screenshot of the error message you received.
You can choose to include a description of the issue along with the screenshot. Or, you can add comments explaining why you think the issue exists. Once you’re done, click Send Feedback. Your submission will be sent to the support team, which will take care of everything else.
Start the system file checker tool
The System File Checker is one of those tools you download and use now and again. You might know about it because it pops up whenever there are problems with your computer. If you’re having trouble installing something, opening programs, or accessing data, the SFC scans your hard drive and tells you what’s wrong.
This method explains how to run the SFC manually. There are many ways to do this, but we’ll show you how to do it quickly.
1. Click the Start button and type cmd into the Search box. Then press Enter.
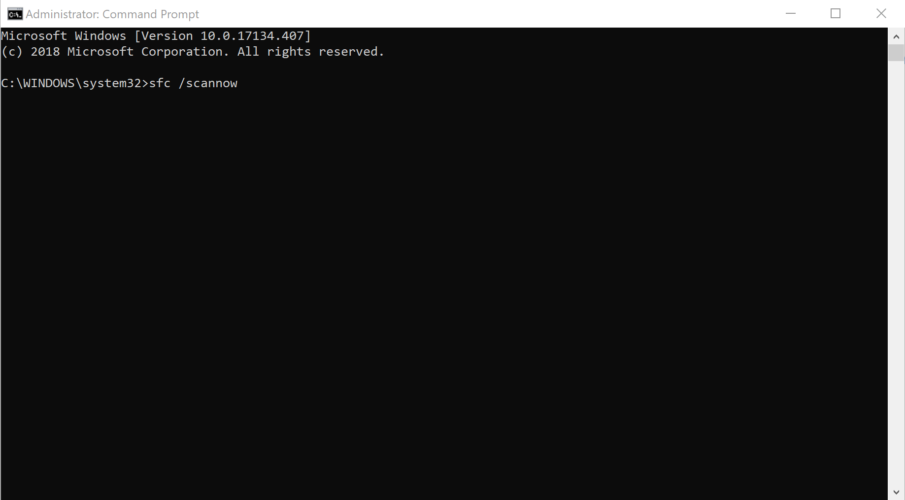
2. In the command prompt window that appears, type sfc /scannow. This will start the System File Checker.
3. When prompted, enter your password and press OK.
4. Wait while the check runs. Once it finishes, the System File Checker will display a list of items found during the scan.
5. Review the errors and decide whether you want to repair each item or ignore them.
Updated: July 2025
This tool is highly recommended to help you fix your error. Plus, this tool offers protection against file loss, malware, and hardware failures, and optimizes your device for maximum performance. If you already have a problem with your computer, this software can help you fix it and prevent other problems from recurring:
- Step 1 : Install the PC Repair and Optimizer Tool. (Windows 10, 8, 7, XP, Vista).
- Step 2 : Click Start Scan to determine what problems you are experiencing with your computer.
- Step 3 : Click Repair Allto resolve all problems.

Ensure that your system is malware-free by scanning it
Malware infections are becoming increasingly common, and it’s essential to keep up with the latest threats. If you don’t know how to do this, you could end up paying a hefty price.
The most commonly used method for detecting malware is scanning your system with antivirus software. This will scan every file on your computer and look for malicious code. However, there are some things you should know about malware infections.
First off, malware infections aren’t always apparent. They might seem harmless programs, such as an ad blocker, or even something that looks legitimate, such as a browser extension. Many people think that installing extensions is the best way to protect themselves against viruses. Unfortunately, this isn’t true. You could install anything, including malware, without realizing it.
If you want to avoid getting infected, here are some tips to help you out.
1. Don’t download random files
2. Keep your operating system updated
3. Install security software regularly
Don’t forget to update your drivers
Outdated drivers are one of the most common causes of system instability. This is because outdated drivers often contain bugs that slow down your computer, causing it to run slowly and crash. In addition, some older drivers don’t support newer operating systems like Windows 10. To solve these problems, you must update your drivers.
You can find out whether your drivers are up to date by opening the Start menu and typing “update.” You’ll see a list of programs that can help you update your drivers. Some of them require additional software, such as Microsoft Security Essentials.
To make sure that you’re downloading the latest version of the correct drivers, go to the manufacturer’s website and download the latest drivers. Then install them according to the instructions. If the problem still occurs, try uninstalling the problematic drivers and restarting your PC.
Make use of the windows memory diagnostic tool
The Windows Memory Diagnostic Tool(WinMDT) is a free utility that allows you to perform a memory dump and analyze it without rebooting your PC. This method works best when you are experiencing problems with your system, such as crashes, hangs, slow performance, etc.
You’ll need to download Winmdt.exe from Microsoft’s website. Once downloaded, extract the contents of the zip file into a folder on your hard disk. You will now see three files inside the extracted folder:
1. wmddiag.exe – A command-line program that performs the memory analysis.
2. wmddiagsrv.dll – An application programming interface (API) used by the wmddiag executable.
3. wmddiagnostics.chm – A help file for the wmddiags.exe program.
To use the tool, launch the wmddiagnostic.chm file. On the left side of the screen, select “Memory Dump.” In the dialog box that appears, choose the option labeled “Create a memory dump.” Click OK. If you receive an error message stating that there is no space remaining on your hard disk, make sure that you’ve selected the correct location for the dump. If you continue to experience errors, try selecting another location.
Once you’ve completed the process, open the wmddiagram.exe file and follow the instructions to view the memory dump. When viewing the dump, look for entries corresponding to processes running on your machine. If you find something suspicious, you can take steps to resolve the issue. For example, if you notice that one of your programs is consuming too much RAM, you might want to close it down. To do so, double-click the entry for the offending program in the list. You can also delete the entry if you wish.
Deactivate windows problem reporting
Suppose none of the methods above seem to fix your Werfaulterrors. In that case, you can try disabling the Windows Error Reporting Service altogether, which is located in the control panel under the administrative tools.
1. To do this, press the Windows key on your keyboard, then hit R.
2. Type in the input box, then click OK to open Services.
3. You’ll see an entry for “Windows Error Reporting.”
4. Right-click it, then select Properties from the menu.
5, In the Properties dialog box, uncheck the box next to Enable Automatic Notification of Problems.
6. Click Ok to close the properties dialog box.
Ensure that the windows error reporting service is restarted
If you are facing issues with the Windows Error Reporting tool, restarting the Windows Error Reporting Service might fix it. This is because the tool works via the Windows Error Reporting Service, and if it stops, it won’t work anymore. You can do this manually or automatically.
To check whether your problem is solved, open the Windows Event Viewer and look for errors related to the Windows Error Reporting tool. If there aren’t any, your issue is probably still present.
APPROVED: To fix Windows errors, click here.
Frequently Asked Questions
How to solve the problem with the windows error reporting service?
- Use the WIN+R key combination to open the Run dialog box.
- Type Services. MSC.
- Right-click or click and hold the Windows Error Reporting Service.
- Select Properties.
- Select Disabled from the menu next to Startup Type.
- Select OK or Apply.
- You can now close the Services window.
Should I disable the windows error reporting service?
The Disable-WindowsErrorReporting command disables the Windows Error Reporting (WER) service on a server. The Windows Error Reporting service is a flexible feedback infrastructure that collects information about hardware and software problems, passes it on to Microsoft, and offers users any available solutions.
Are windows error reports important?
Windows Error Reporting, also known as Werfault.exe, is the process that handles your error messages. If one of your applications fails or a problem occurs, you can report it to Microsoft and increase the likelihood that the problem will be resolved in a future update.