- Download and install the software.
- It will scan your computer for problems.
- The tool will then fix the issues that were found.
If you’ve ever received a pop-up notification about “This setting is managed by your administrator,” it could mean one thing: your computer is infected with malware. In fact, there are several reasons why you might receive such a warning, including if someone else installed software on your PC without your permission. If you see this error message while trying to access a program, here’s how to fix it.
- First, check to make sure you haven’t accidentally downloaded malicious software onto your system. Scroll down to the bottom of the list and select Uninstall apps. This will show you every app that’s been installed on your machine since the beginning of time. Look for anything suspicious, like unfamiliar names or strange icons.
- Click on Turn windows features on or off. Once there, scroll down to find the option called Internet Explorer Enhanced Security Configuration. Toggle this feature off. Now, whenever you attempt to launch IE, you won’t see the “This setting is managed…” warning.
- Finally, you can delete the Registry Key that’s causing issues. Open up Regedit, navigate to HKEY_LOCAL_MACHINE\SOFTWARE\Microsoft\Windows NT\CurrentVersion\Winlogon and delete the following value named Shell.
- You’ll want to repeat this process each time you encounter the problem. While some people report success simply deleting the offending value, others say that doing so doesn’t work. For those cases, you’ll need to manually edit the Registry. Navigate to HKEY_CURRENT_USER\Software\Microsoft\Windows\CurrentVersion\RunOnce and add the following string: %SystemRoot%\system32\rundll32.exe shell32.dll,Control_RunDLL “%1”.
Now, whenever you run into the same problem, just restart your computer and you should no longer see the popup.
Table of Contents:
What does the “This setting is managed by your administrator” mean?

The “This setting is managed by your administrator” error message pops up when you try to change something in Windows 10. You might think it’s just a warning, but it actually means that someone else controls the settings. This could be because you didn’t log out properly, or maybe you forgot to sign off while working on another device. Whatever the case may be, here are some initial steps you can do to fix it.
Check the power button
If you press the power button multiple times, you might accidentally turn off your PC. If you find yourself doing this often, check whether you pressed the button too hard. If you did, you might want to restart your PC immediately.
Restart the system
Sometimes, rebooting your PC can help clear up problems like this one. To do this, hold down the power button for five seconds. Afterward, let go of the button and wait for the screen to shut off completely. Then, hit the power button again to start the process over.
Reset the network connection
You might have clicked the wrong option in the Network & Internet window. In such cases, resetting the network connection can solve the problem. To do this, follow these steps:
Check for windows updates
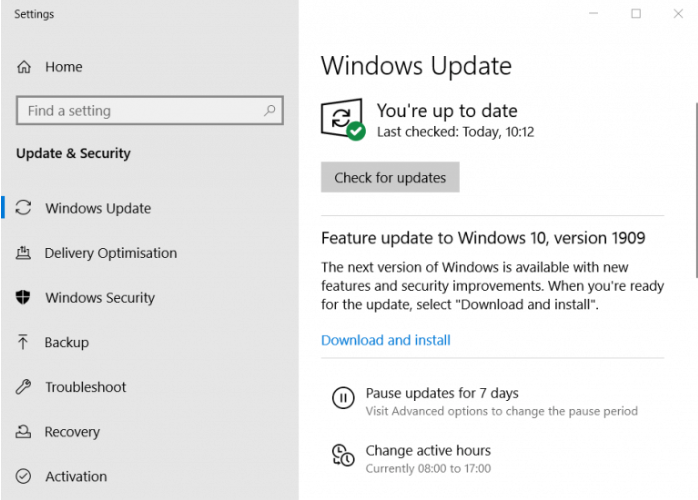
If there are no updates available for Windows 10, it could mean one thing—you’re running outdated software. You should check for Windows updates before installing anything else. This way, you can make sure your computer isn’t infected with malware.
Your PC might be infected if…
- You haven’t checked for updates recently.
- You’ve been ignoring security alerts.
- You’ve never updated your operating system.
- You’re downloading files from untrusted sources.
- You use an unsecured Wi-Fi network.
Updated: July 2025
This tool is highly recommended to help you fix your error. Plus, this tool offers protection against file loss, malware, and hardware failures, and optimizes your device for maximum performance. If you already have a problem with your computer, this software can help you fix it and prevent other problems from recurring:
- Step 1 : Install the PC Repair and Optimizer Tool. (Windows 10, 8, 7, XP, Vista).
- Step 2 : Click Start Scan to determine what problems you are experiencing with your computer.
- Step 3 : Click Repair Allto resolve all problems.

Scan for viruses and malware
If you want to make sure your computer is safe from viruses and malware, it’s important to regularly scan it for such threats. You can do this manually, but we recommend using a reliable anti-malware program. With just one click, you’ll be able to detect and delete malicious software.
- To begin scanning, open the program and select Scan Now.
- If you’re prompted to update the application, simply follow the prompts.
- Otherwise, click OK. After the scan completes, you’ll see a summary report.
- Click View Report to view detailed information about each detected threat.
- You can also run a full system scan. To start, click System Scanner.
- Then, click Next. Select the items you’d like to include in the scan and click Start.
- Once complete, a notification window will pop up.
- Click Close to close the notification.
Check if you are using any third-party tool
Sometimes, it seems like our computers just don’t work properly anymore. We spend hours trying to fix everything, but nothing works. Then we realize that some software is causing problems. If you want to know what applications are running on your computer, use Process Explorer. This free utility allows you to see exactly what processes are running on your PC. You’ll even be able to stop unwanted processes.
Process Explorer lets you view information about each process including the process name, command line arguments, parent process, CPU usage, memory usage, virtual memory size, file handles, threads, DLLs loaded into the process, thread priority, and much more. You can easily kill a process by clicking on the red X button next to the process’ name.
Check the registry or group policy setting
To change the configuration, you need to know where to look. You’ll need to check registry and group policy settings, because there are many different places where Windows Defender could be configured. This article walks you through how to find it.
In Windows 10, Microsoft added a new location called “Windows Defender Security Center.” In older versions of Windows, you can still access the same information via the Control Panel.
Here are the steps to follow:
- Open the Settings app.
- Open the Programs & Features section.
- Look for the program name listed under the heading “Microsoft Security Client.”
- If you don’t see it, try searching for “Defender,” “SecurityCenter,” or “Windows Defender.”
- Right-click on the program name and select Uninstall.
- Restart your computer.
Delete the antispyware
The AntiSpyware is one of those programs that seems like it does what it says on the tin. The program claims to protect your computer against malware, viruses, spyware, adware, trojans, etc., although we found no evidence that it actually did anything useful. But even though it doesn’t do much, it still takes up space on your hard disk. And since there are some legitimate reasons why you’d want to delete AntiSpyware, here’s how to do it.
If you’re running Windows 10, you’ll probably find the process quite easy. If you’re using Windows 7 or 8, you’ll have to use the Add/Remove Programs tool. You can download it from Microsoft’s web site. Once you’ve installed it, launch it and select “Add New Software…”. Then choose “Windows Components” from the list and scroll down to “Antispyware”. Click Next twice, then follow the prompts. Once you’ve deleted the program, reboot your system and you should be good to go.
Remove the windows defender registry
Windows Defender is one of those programs that we don’t really think about much. But it’s there, running quietly in the background, protecting our computers against malware and viruses. And while it does a good job of keeping us safe, sometimes it gets into trouble itself. If you ever find yourself having issues with Windows Defender, here are some things you can do to resolve them.
The first thing you want to do is make sure you know what you’re dealing with. You can check out this article here to see how to identify different kinds of threats. Once you know what type of threat you’re facing, you can start looking for solutions.
To delete Windows Defender registry keys, you must export them. This involves exporting each individual key, along with all subkeys, values, and strings associated with it. You can use RegEdit to accomplish this task. Here’s how to do it:
- Open up RegEdit.
- Navigate to HKEY_LOCAL_MACHINE\SOFTWARE\Microsoft\Windows Defender\.
- Right-click on the folder and select Export.
- Name the file something like “Registry Keys”.zip.
- Save the file somewhere safe.
- Extract the contents of the zip file.
- Delete any keys you don’t need.
- Restart your PC.
APPROVED: To fix Windows errors, click here.
Frequently Asked Questions
What is “This setting is managed by your administrator” issue?
When you open up the Settings app, there are three tabs: Personalization, Privacy, and Accounts & Sync. If you navigate to the latter tab and select “Privacy,” you will see a section called “Microsoft Edge security.” You can access this section by clicking on the gear icon located in the upper-right corner of the screen and selecting “Settings.”
The problem arises when you try to change the option “Turn off SmartScreen Filters.” When you attempt to make this selection, you will receive a popup notification saying that the “This setting is managed by your administrator.”
How can you fix this setting is managed by your administrator?
Your Windows 10 PC might show up as having a problem with Group Policy. This could happen because someone else manages it for you. If you don't know what I'm talking about, here's how to find out:
- Open the Settings app.
- Click on Privacy and select Diagnostics & feedback. You'll see options like "Basic" and "Full." Choose "Full," since it's recommended.
- Restart the computer.
- You'll get some diagnostic information about your privacy settings. Click OK twice.
- If you're still seeing errors, contact your system administrator.
How to scan your PC for virus and malware?
- Open the program and select Scan Now.
- If you're prompted to update the application, simply follow the prompts.
- Click OK. After the scan completes, you'll see a summary report.
- Click View Report to view detailed information about each detected threat.